WPF교육, WPF학원, WPF 버튼(Button)과 Control
http://ojc.asia/bbs/board.php?bo_table=WPF&wr_id=163
ojc.asia
- Control 클래스는 FrameworkElement를 직접 상속받으며 UI를 위한 기본클래스를 정의하는데 상속 계층 구조는 다음과 같다.https://www.youtube.com/watch?v=K3v-A5d2fNI&list=PLxU-iZCqT52Cmj47aKB1T-SxI33YL7rYS&index=21&t=4s

https://www.youtube.com/watch?v=Ycb2Tg56l-M&list=PLxU-iZCqT52Cmj47aKB1T-SxI33YL7rYS&index=17&t=3s

Namespace: System.Windows.Controls
Assembly: PresentationFramework (in PresentationFramework.dll)
System.Object
System.Windows.Threading.DispatcherObject
System.Windows.DependencyObject
System.Windows.Media.Visual
System.Windows.UIElement
System.Windows.FrameworkElement
System.Windows.Controls.Control
System.Activities.Presentation.Toolbox.ToolboxControl
System.Windows.Controls.Calendar
System.Windows.Controls.ContentControl
System.Windows.Controls.DataGridRow
System.Windows.Controls.DatePicker
System.Windows.Controls.FlowDocumentReader
System.Windows.Controls.FlowDocumentScrollViewer
System.Windows.Controls.ItemsControl
System.Windows.Controls.KeyTipControl
System.Windows.Controls.PasswordBox
System.Windows.Controls.Primitives.CalendarItem
System.Windows.Controls.Primitives.DocumentViewerBase
System.Windows.Controls.Primitives.RangeBase
System.Windows.Controls.Primitives.ResizeGrip
System.Windows.Controls.Primitives.TextBoxBase
System.Windows.Controls.Primitives.Thumb
System.Windows.Controls.Ribbon.RibbonContextualTabGroup
System.Windows.Controls.Ribbon.RibbonTwoLineText
System.Windows.Controls.Separator
System.Windows.Controls.StickyNoteControl
- Window는 ContentControl을 거쳐서 Control을 상속 받았으므로 FrameworkElement와 Control의 일부 프로퍼티에 대해 사용 가능한데 Control에 정의된 프로퍼티는 Background, Foreground, BorderBrush, BorderThicknees, FontWeight등이 있다.
- TextBlock도 폰트와 관련된 프로퍼티가 있지만 Control을 상속받지 않았고 자체적으로 정의해서 사용하고 있다.
- Control을 상속받은 클래스는 주로 버튼, 리스트박스, 스크롤바, 에디터필드, 메뉴, 툴바와 같은 기능을 제공하며 이 클래스들은 System.Windows.Controls, System.Windows.Controls.Primitives 네임스페이스에 있으며 여기에는 Control을 상속하지 않은 클래스들도 정의되어 있다.
- 컨트롤 중 가장 자주 사용되는 버튼은 WPF에서 Button으로 표시하며 Click 이벤트는 마우스를 클릭시 호출되는 이벤트이다.
- 버튼의 Content 프로퍼티에는 텍스트 문자열을 할당하고 Button 객체 그 자체는 Window의 Content 프로퍼티에 할당되고 할당되는 순서는 중요하지 않다.
- Window 처럼 Button도 Content 프로퍼티가 있는 이유는 두 클래스 모두 ContentControl을 상속받고 있기 때문이다.
다음은 Button 클래스의 상속 계층 구조이다.
Namespace: System.Windows.Controls
Assembly: PresentationFramework (in PresentationFramework.dll)
System.Object
System.Windows.Threading.DispatcherObject
System.Windows.DependencyObject
System.Windows.Media.Visual
System.Windows.UIElement
System.Windows.FrameworkElement
System.Windows.Controls.Control
System.Windows.Controls.ContentControl
System.Windows.Controls.Primitives.ButtonBase
System.Windows.Controls.Button
System.Activities.Presentation.PropertyEditing.EditModeSwitchButton
System.Windows.Controls.Primitives.CalendarButton
System.Windows.Controls.Primitives.CalendarDayButton
System.Windows.Controls.Ribbon.RibbonButton
- 마우스의 움직임에 따라 서식있는 문자열의 프로퍼티를 다루는 예제를 만들어 보자.
- WPF 응용프로그램 프로젝트 생성 후 MainWindow.xaml.cs 파일을 수정하자.
using System.Windows;
using System.Windows.Controls;
using System.Windows.Documents;
using System.Windows.Input;
using System.Windows.Media;
namespace ButtonTest1
{
public partial class MainWindow : Window
{
//Run 클래스는 텍스트의 실행을 포함하기 위한 인라인 요소를 정의
Run runButton1;
Run runButton2;
public MainWindow()
{
InitializeComponent();
Title = "ButtonTest1";
// Create the Button and set as window content.
Button btn = new Button();
btn.HorizontalAlignment = HorizontalAlignment.Center;
btn.VerticalAlignment = VerticalAlignment.Center;
btn.MouseEnter += ButtonOnMouseEnter;
btn.MouseLeave += ButtonOnMouseLeave;
Content = btn;
// Create the TextBlock and set as button content.
TextBlock txtblk = new TextBlock();
txtblk.FontSize = 24;
txtblk.TextAlignment = TextAlignment.Center;
btn.Content = txtblk;
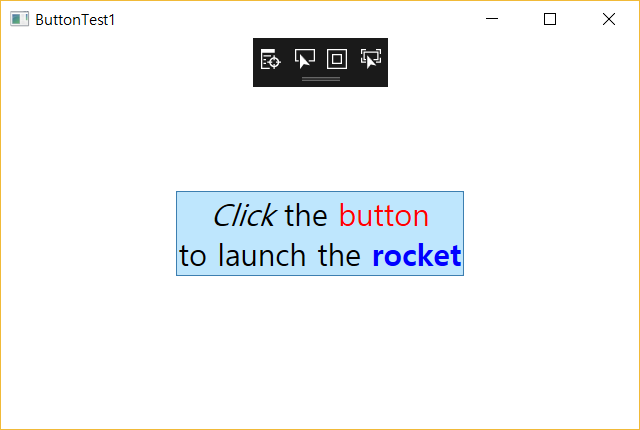
// 서식화된 텍스트 출력
txtblk.Inlines.Add(new Italic(new Run("Click")));
txtblk.Inlines.Add(" the ");
txtblk.Inlines.Add(runButton1 = new Run("button"));
txtblk.Inlines.Add(new LineBreak());
txtblk.Inlines.Add("to launch the ");
txtblk.Inlines.Add(new Bold(runButton2 = new Run("rocket")));
}
//마우스가 버튼 안으로 들어가면 Run(runButton)객체의 Foreground 프로퍼티가 빨강으로 된다.
void ButtonOnMouseEnter(object sender, MouseEventArgs args)
{
runButton1.Foreground = Brushes.Red;
runButton2.Foreground = Brushes.Blue;
}
//마우스가 빠져 나가면 SystemColors.ControlTestBrush로 부터 기본텍스트 색을 얻어와 설정한다.
void ButtonOnMouseLeave(object sender, MouseEventArgs args)
{
runButton1.Foreground = SystemColors.ControlTextBrush;
runButton2.Foreground = SystemColors.ControlTextBrush;
}
}
}
- 실행화면
- WPF에서 흔히 리소스는 어셈블리 리소스(Assembly Resource)로 비주얼 스튜디오 프로젝트의 일부로 만들어지는 것을 말하며 실행파일이나 DLL의 일부가 된다.
- 이미지 버튼을 만들어 보는데 이미지를 URL에서 가지고 오지 않고 Resource로써 실행파일 안에 같이 빌드하는 예제를 작성해 보자.
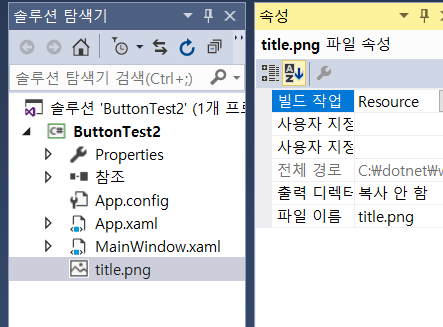
- ButtonTest2라는 WPF 프로젝트를 생성하자.
- 다음으로 PC의 적당한 이미지를 리소스로 추가해야 되는데 프로젝트에서 마우스 우측버튼 추가 -> 기존 항목 추가 선택 후 적당한 이미지를 선택하자. 그런 다음 추가된 이미지의 속성에서 빌드작업 -> Resource로 되어 있는지 확인하자.
- MainWindow.xaml.cs
using System;
using System.Collections.Generic;
using System.Linq;
using System.Windows;
using System.Windows.Controls;
using System.Windows.Media;
using System.Windows.Media.Imaging;
namespace ButtonTest2
{
public partial class MainWindow : Window
{
public MainWindow()
{
InitializeComponent();
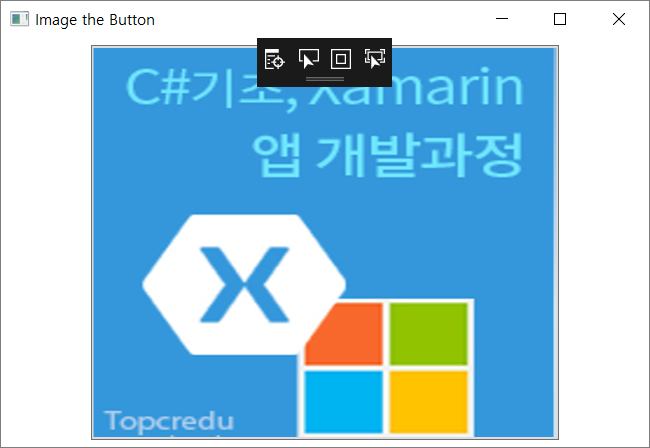
Title = "Image the Button";
Uri uri = new Uri("pack://application:,,,/title.png");
BitmapImage bitmap = new BitmapImage(uri);
Image img = new Image();
img.Source = bitmap;
// 할당된 공간을 채우기 위해 이미지의 크기를 조정하는 방법을 제공
// None : 원래 크기를 그대로 유지
// Uniform : 원래의 가로 세로 비율을 유지하면서 대상 크기에 맞게
// 콘텐츠 크기가 조정됩니다.
// UniformToFill : 원래의 가로 세로 비율을 유지하면서 대상 크기에 맞게
// 콘텐츠 크기가 조정됩니다. 대상 사각형의 가로 세로 비율이
// 원본과 다를 경우 원본 콘텐츠가 대상 크기에 맞게 잘린다.
img.Stretch = Stretch.None;
Button btn = new Button();
btn.Content = img;
btn.HorizontalAlignment = HorizontalAlignment.Center;
btn.VerticalAlignment = VerticalAlignment.Center;
Content = btn;
}
}
}
- 실행 화면
- 하나의 이미지를 여러곳에서 사용할 때는 이미지를 리소스로 등록하여 한번만 로드 시킨 후 BitmapImage로 만들고 StaticResource로 공유해서 사용하면 된다.
<BitmapImage x:Key="ImageSource1" UriSource="../images/Image.png" />
……
<Image Source="{StaticResource ImageSource1}" />


