2019년 1월 26일 토요일

WPF 데이터바인딩, InotifyPropertyChanged 인터페이스, PropertyChanged 이벤트를 통한 데이터 바인딩 ​

WPF 데이터바인딩, InotifyPropertyChanged 인터페이스, PropertyChanged 이벤트를 통한 데이터 바인딩
9 InotifyPropertyChanged 인터페이스, PropertyChanged 이벤트를 통한 데이터 바인딩
n 의존 프로퍼티를 정의하는 것은 데이터 바인딩의 소스로서 역할을 수행하는데 이 방법이 유일한 방법은 아니다. 전통적인 방법은 이벤트를 만드는 것인데 이벤트를 특정한 방법으로 정의하면 WPF내의 데이터 바인딩 로직이 이벤트를 사용할 수 있다.
WPF의 데이터 바인딩 로직은 이벤트가 INotifyPropertyChanged 인터페이스를 구현한 클래스안에 정의되어 있으면 이벤트를 찾는다. 이 인터페이스를 상속받아 구현하면 PropertyChangedEventHandler 델리게이트를 기본으로 하는 PropertyChanged 이벤트를 정의해야 한다.
public event PropertyChangedEventHandler PropertyChanged;
n DateTime 프로퍼티를 아래와 같이 수정하자.
public string DateTime
{
get { return DateTime.Now; }
}
n TimerOnTick 메소드를 수정하자.
void TimerOnTick(object sender, EventArgs args) {
if (PropertyChanged != null) {
PropertyChanged(this, new PropertyChangedEventArgs("DateTime"));
}
}
n PropertyChanged 이벤트를 발생시킬 때의 처음인자는 this이며 두번째 인자는 PropertyChangedEventArgs 타입의 객체이다. PropertyChangedEventArgs는 EventArgs를 상속받아 추가적인 string 타입의 PropertyName 이라는 프로퍼티를 정의하는데 이 프로퍼티는 변경될 프로퍼티를 구별하기 위해 사용한다. 또한 PropertyChangedEventArgs는 string 인자를 가진 생성자를 통해 PropertyName을 설정한다.
n 클래스에서 DateTime 이라는 프로퍼티를 정의했다면 DateTime이 변경될 때 PropertyChanged 이벤트가 발생되어야 하는데 아래 코드를 통해 가능하다.
PropertyChanged(this, new PropertyChangedEventArgs(“DateTime”));
이 방법이 다수의 프로퍼티를 다루는 좋은 방법이다. 하나의 PropertyChanged 이벤트가 이들을 다 처리하기 때문이다. 아래는 전체 소스코드이니 ClockTicker2.cs를 만들고 MainWindow.xaml를 수정해서 확인해 보자.
ColckTicker2.cs
using System;
using System.Windows;
using System.Windows.Threading;
using System.ComponentModel;
namespace DigitalClock
{
public class ClockTicker2 : INotifyPropertyChanged
{
// INotyfyPropertyChanged 인터페이스가 요구하는 이벤트
public event PropertyChangedEventHandler PropertyChanged;
// public 프로퍼티, CLR Property
public string DateTime
{
get { return DateTime.Now.ToString(yyyyMMddHHmmss); }
}
// 생성자에서 Timer를 설정
public ClockTicker2()
{
DispatcherTimer timer = new DispatcherTimer();
timer.Tick += TimerOnTick;
timer.Interval = TimeSpan.FromSeconds(1);
timer.Start();
}
// PropertyChanged 이벤트를 발생시키는 타이버 이벤트 핸들러
void TimerOnTick(object sender, EventArgs args)
{
if (PropertyChanged != null)
{
PropertyChanged(this, new PropertyChangedEventArgs("DateTime"));
}
}
}
}
INotifyPropertyChanged 인터페이스를 이용한 데이터 바인딩 예제2
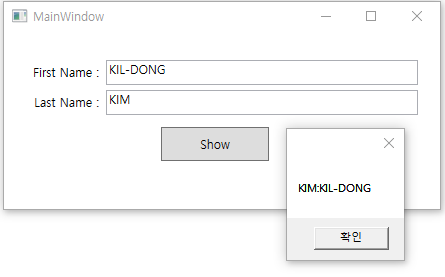
프로젝명 : LoginWindow
[MainWindow.xaml]
<Window x:Class="LoginWindow.MainWindow"
xmlns:local="clr-namespace:LoginWindow"
xmlns:vm="clr-namespace:LoginWindow.ViewModel"
mc:Ignorable="d"
Title="MainWindow" Height="450" Width="800">
<Window.DataContext>
<vm:ViewModel x:Name="VMMainWindow"/>
</Window.DataContext>
<Grid>
<Grid.ColumnDefinitions>
<ColumnDefinition Width="100"/>
<ColumnDefinition Width="*"/>
<ColumnDefinition Width="20"/>
</Grid.ColumnDefinitions>
<Grid.RowDefinitions>
<RowDefinition Height="25"/>
<RowDefinition Height="30"/>
<RowDefinition Height="*"/>
</Grid.RowDefinitions>
<Label Content="First Name :" Grid.Column="0" Grid.Row="1" HorizontalAlignment="Right" VerticalAlignment="Center"></Label>
<Label Content="Last Name :" Grid.Column="0" Grid.Row="2" HorizontalAlignment="Right" VerticalAlignment="Center"></Label>
<TextBox Grid.Row="1" Grid.Column="1" Height="25" Text="{Binding FirstName, Mode=TwoWay}" Margin="2"></TextBox>
<TextBox Grid.Row="2" Grid.Column="1" Height="25" Text="{Binding LastName, Mode=TwoWay}" Margin="2"></TextBox>
<Button x:Name="button" Content="Show" Grid.Column="1" HorizontalAlignment="Left" Margin="57,10,0,0" Grid.Row="3" VerticalAlignment="Top" Width="108" Height="34" Click="button_Click"/>
</Grid>
</Window>
[MainWindow.xaml.cs]
using System.ComponentModel;
using System.Windows;
namespace LoginWindow
{
/// <summary>
/// MainWindow.xaml 대한 상호 작용 논리
/// </summary>
public partial class MainWindow : Window
{
public MainWindow()
{
InitializeComponent();
}
private void button_Click(object sender, RoutedEventArgs e)
{
MessageBox.Show(VMMainWindow.LastName + ":" + VMMainWindow.FirstName);
}
}
}
[User.cs]
using System.ComponentModel;
namespace LoginWindow.Model
{
public class User : INotifyPropertyChanged
{
private string _fisrtname;
public string FirstName
{
get
{
return _fisrtname;
}
set
{
_fisrtname = value;
RaisePropertyChange();
}
}
private string _lastname;
public event PropertyChangedEventHandler PropertyChanged;
public string LastName
{
get
{
return _lastname;
}
set
{
_lastname = value;
RaisePropertyChange();
}
}
public void RaisePropertyChange([CallerMemberName] string propertyname = null) {
if (PropertyChanged != null)
{
PropertyChanged(this, new PropertyChangedEventArgs(propertyname));
}
}
}
}
[ViewModel.cs]
using LoginWindow.Model;
namespace LoginWindow.ViewModel
{
public class ViewModel : User
{
public ViewModel()
{
FirstName = "KIL-DONG";
LastName = "KIM";
}
}
}
#PropertyChanged, #InotifyPropertyChanged, #데이터바인딩#WPF데이터바인딩#DataBinding#WPF#WPF강좌#WPF교육#WPF강의#시샵#닷넷#Csharp#XAML,

댓글 없음:

댓글 쓰기

(C#교육동영상)C# ADO.NET 실습 ODP.NET/ODAC 설치 오라클 함수 호출 실습, C#학원, WPF학원, 닷넷학원, 자바학원

  (C#교육동영상)C# ADO.NET 실습  ODP.NET/ODAC 설치  오라클 함수 호출 실습, C#학원, WPF학원, 닷넷학원, 자바학원 https://www.youtube.com/watch?v=qIPU85yAlzc&list=PLxU-i...